
In Zoho CRM, what are webforms?
The webform is often your customer’s first point of contact with your company. If you structure your forms well, leads will be more likely to submit their information. Monitoring individual fields and geographical data will help you determine how well your web forms are performing.
Within Zoho CRM’s web forms you can construct forms with the same fields as the forms within the modules you select. A web form is a simple method for capturing information from your website and entering it into a CRM system. The web forms are designed to automate the import of data from websites into Zoho CRM. Non-technical users can easily design and publish their own web forms. In this way, all information that your visitors provide will automatically be added to their CRM record.
Video clip- Zoho CRM Webforms
Zoho CRM WebForms: The Definitive Guide
Every website has a Contact Us page, right? Unfortunately, that’s not all. Do you know where your Leads go after they fill out your web form? Do you manually move them from your website to your CRM system? This is not recommended. Zoho CRM web forms let you get leads directly into your CRM when they fill out a form on your website. Additionally, you can set it up so that you are notified when Leads come into your CRM so that you can follow up promptly. Once the Lead fills out the form, you can create an automated response and even set up a drip campaign for them. Zoho CRM’s web forms offer many options.
To generate forms for Leads , Contacts , Cases and any other Custom Module that you have in your account can be added using Zoho web forms. Please review the following checklist before you begin the process:
- Send visitors to your website automated responses when they submit their information using a default email template.
- For incoming records to be assigned to specific users or based on the round-robin method, create an assignment rule. All incoming records are assigned to the administrator by default.
- If necessary, you can customize the web form further.
- Add custom fields to the web form.
- Test the web form before publishing it.
There are many uses for web forms, including:
- Capture data (visitors’ information)
- Communicate with website visitors
- Conduct surveys
- Respond to user questions
- Generate online sales
- Receive online feedback
Using web forms straight into Zoho CRM.
How can I access the Zoho CRM form?
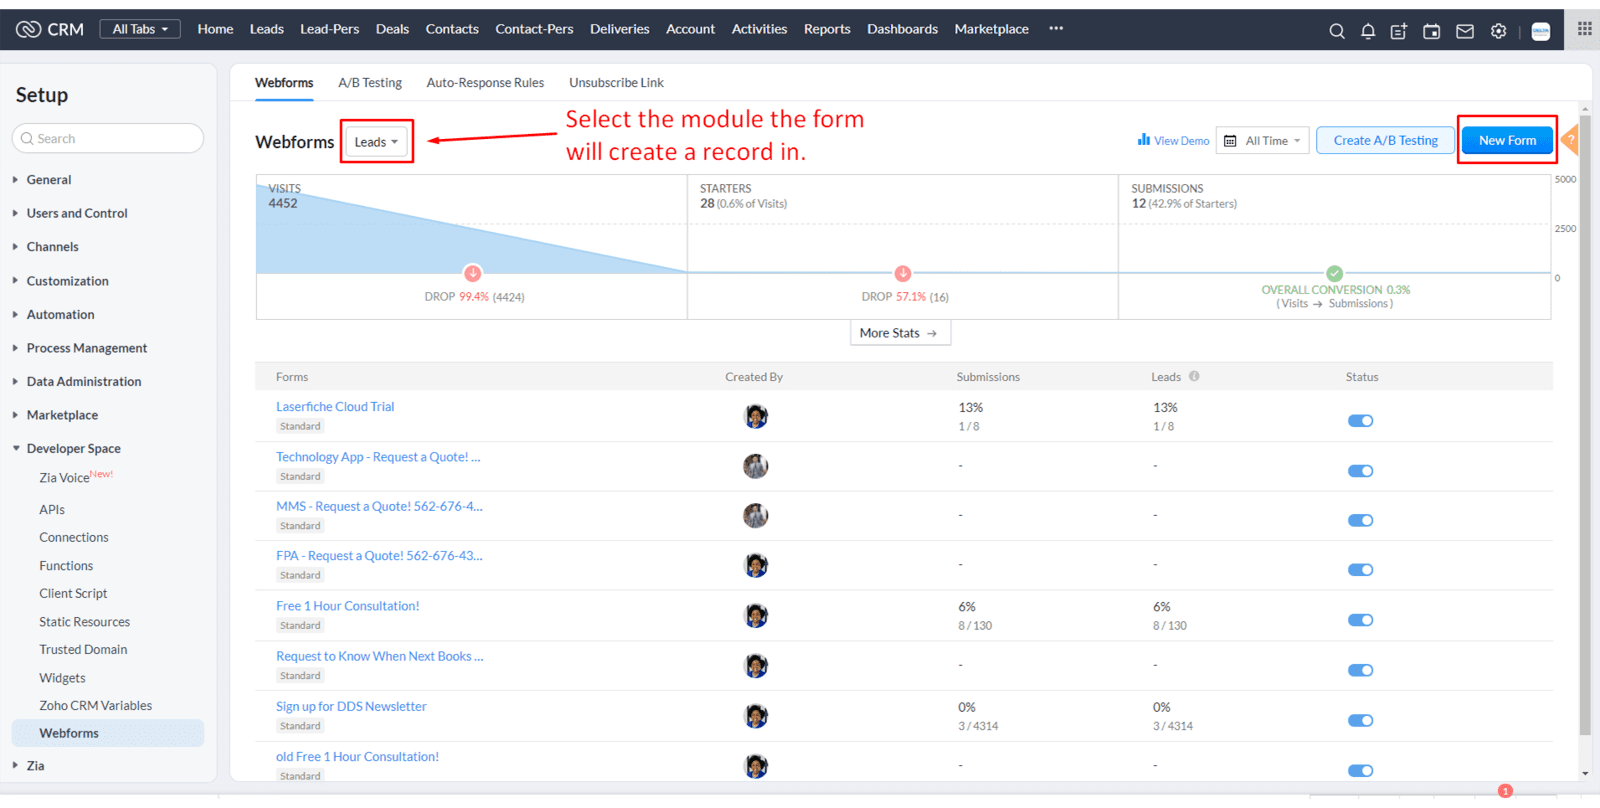
Zoho CRM webforms can be accessed by going to Setup > Developer Space > Webforms. Forms and auto-responders can be created here, along with A/B testing, form analytics, and forms. Let’s begin by creating a form.
Creating a Zoho CRM Webform
Step 1-
To create a form, navigate to the CRM settings and select ‘web forms’ under the ‘developer space’. Adding the relevant fields to your form (some of which can be pre-populated, for example, you may wish to have the page on which they are embedded as your lead source each time) will help you automate it.

Step 2 –
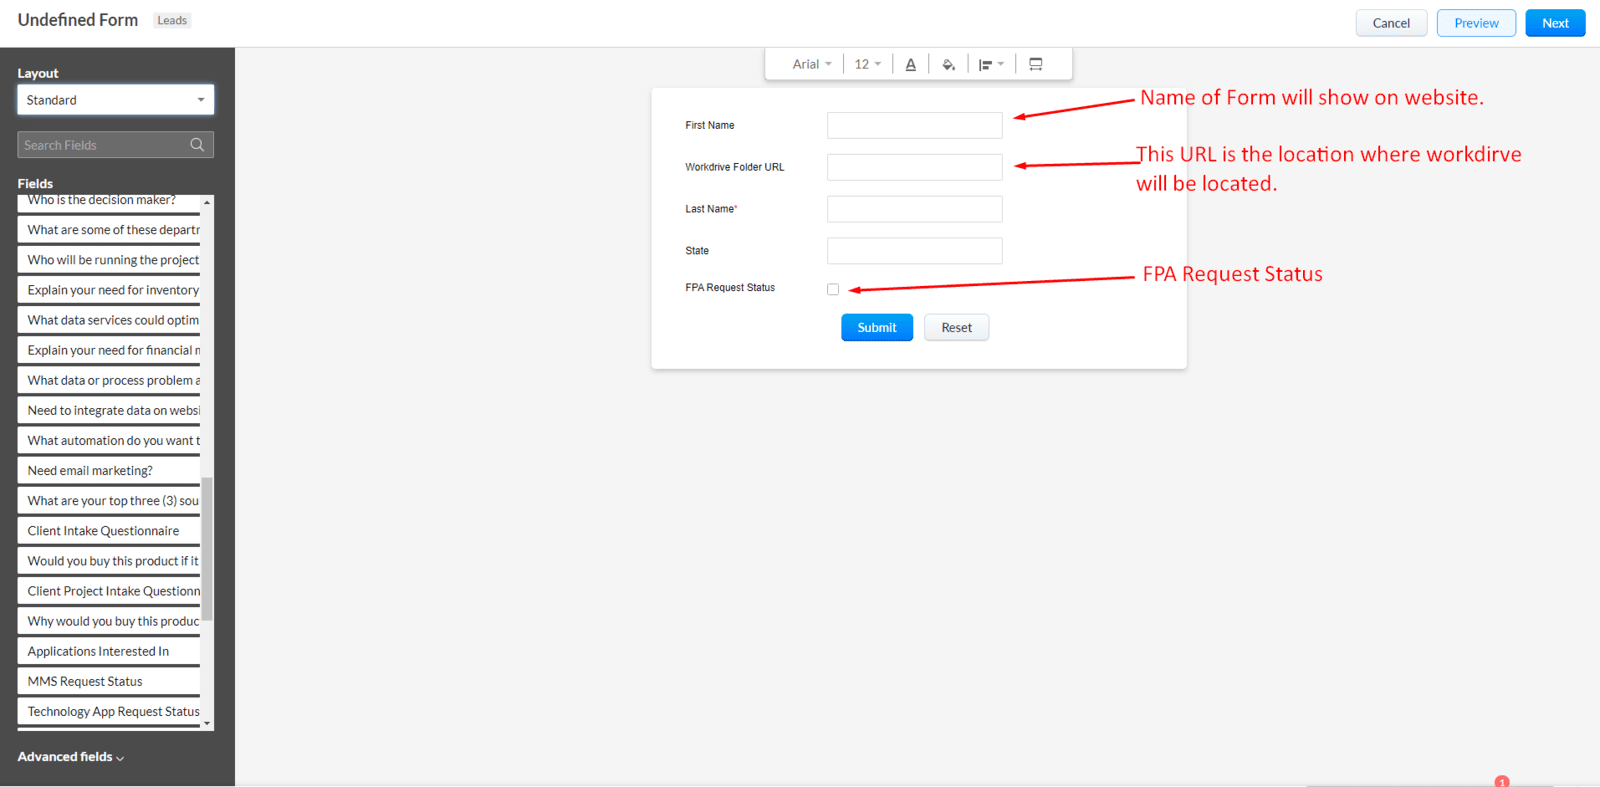
By selecting the module layout you will be putting the information into, you can move the fields from the left side panel to the form builder. The fields that exist in the selected layout are the only ones that you can select. With the editing toolbar at the top, you can add some design touches to your form. With your cursor over a field, you will see a gear icon, which allows you to set the field as required, hidden field with a pre-set value, or add help text. At the bottom of the form are buttons that allow you to change the values displayed. Whenever someone fills out my Contact Us form, they will appear as a lead, along with the service they are interested in, and by default all leads added via this form will have a Web Research lead source.
‘Advanced Tools’ like the Captcha, which is the security measure that requires a user to enter the numbers and letters displayed to prove that they are not spammers, are available to you as well. File upload is also included in Advance Tools.
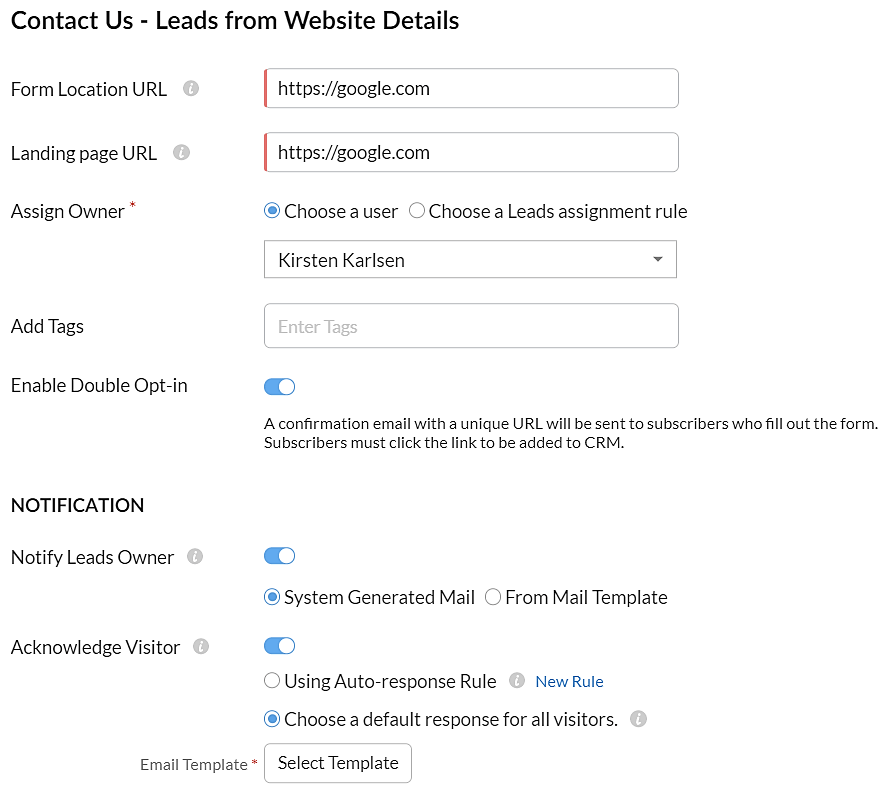
The following screen is where you will set most of the form’s settings. Make sure you take your time during this step.
- Name the form. Remember, the name of the form will be displayed on the website.
- The form location URL is the address of the page where the form will be displayed. If the form will appear on multiple pages, enter * here.
- An URL for the landing page is the page the user will be redirected to after filling out the form. An example would be a thank-you page after the form is submitted as well as confirmation emails. Every website needs one.
- It is possible to assign the Lead Owner according to rules or as a single individual.
- The leads that come in through the web form can be tagged as ‘Web Form Lead’. Additionally, you can create a workflow that assigns the lead to a given Lead Source you select, like a Web Form, using the tag.
Step 3 –
Choose your next action. Fill out the Form Details page with a Form Name (eg. Feedback form, Data form, etc.). The Dialogue box will ask for the landing page URL both to place the form and to redirect the user once the form is submitted. In the Domain Name box, enter the URL of the website where the web form will be hosted. Be sure to include the “http://” prefix. A primary domain name can be prefixed with this. In this way, spams are prevented, and only forms submitted through a particular domain are considered valid.
These fields must be filled in, but you can edit them before publishing if you are unsure of the destination. The option to name a user or choose record assignment rule will also be available, as well as options to add tags, notify record owners, acknowledge visitors, and more.
Other useful automated features are also available for forms. A new lead can be assigned to the appropriate member of staff, a notification to the lead owner is sent if the lead has been assigned, you can track a visitor’s IP address (using Visitor Tracking and SalesIQ) to see how they interacted with your website, and a member of management can approve the lead.
Using auto-responder rules, you can follow up on form submissions with an auto response email (automatic greeting email) or send a brochure for a service your visitor is interested in.
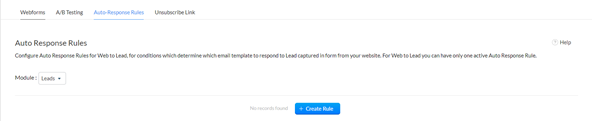
Web Forms: Send an Auto-Response Rule
Businesses record and track prospects’ information in their CRM when they receive enquiries from prospects via their website. It is now time to pursue these prospects in hopes of closing the deal. In addition to following up with each of them, this process often involves sending the same routine emails to many people one by one, which can be very time consuming when done manually. Following up manually can result in you missing out on responding to some of the leads, which can prove risky since, you might just be missing out on a big opportunity.
Therefore, it would be a good idea to utilize CRM automation features so that you can save time and effort. As for website enquiries, you can automate a response to each lead the moment they fill out your web form using Auto-Response Rules.
Note– If the information gathered through the web form does not meet the Auto Response Rule criteria, then the email template (acknowledgment email) will be sent.
Step 4 –
Generating the code for the form
Embedding the form in various code formats. Three different versions of the embed form code of the web form are available: Source code , Embed code , and iFrame code.
- The source code (which is HTML and you can modify the look and feel of the form)
- Embed (un-editable link)
- iFrame (un-editable link)
There are codes for third-party sites (WordPress, Google Sites, Facebook, and Joomla) readily available. Choose your form code format option, copy the code, and insert it onto your website!
As soon as your form is up and running, you can access analytics related to clicks. Once you have completed your form, you should be able to generate the embed code so you can embed it on your or a partner’s website. Test the various types of code on your website to see which one works. This includes submissions, lead conversions, and more. It is even possible to create variations of the same form and then use analytics to determine which one drives better results. The CRM Web form creation process ends.

Step 5-
Webforms A/B Testing
Optimizing your web forms will help you earn more customers because they are one of the most commonly used tools for lead generation. Testing your web forms is therefore important. A/B testing provides you with data that helps you determine which webform performs best.
Various parameters such as number of submissions, fields filled out, etc. can be used to analyze how the webforms are performing. A/B testing of your webforms can help you increase conversion rates.
Video- Tutorial to Webforms A/B testing
Summary
Having spent time filling out your form, people look forward to your response. It’s important to respond within a reasonable amount of time. The response might arrive within 30 minutes, but if it isn’t up to the mark in terms of quality and relevance, it won’t serve the purpose.
The key to hitting the bull’s eye is crafting a response that is tailored to your leads’ needs. It’s impossible to achieve this if your CRM couldn’t capture customer info in one step.
Lead-to-opportunity conversion is quick and easy with Zoho CRM’s pre-built web-to-lead generation machines.

